I love drawing on eggs. I was told how to do this last year (see my older post) but have been told a newer way to add color. You really should try this - even if "I can't draw" tends to stop you in your tracks. Its all about simple blending and then line drawing. Children LOVE this, and to have this round fragile object teaches them to be gentle as well as careful - yes even the rowdy ones!
Start will a raw egg and nail - gently tap the nail to create a hole in the top and bottom of the egg (centered as much a possible but don't worry too much). You can then get a wire to place inside the hole and wiggle it around to break the yolk up so you then can blow into the top hole which blows the wet egg out the bottom hole. Do not wash the inside of the egg - it dries inside and actually makes a stronger egg shell - but doesn't smell (much).
Scrambled eggs for dinner anybody??


Try to make the hole as small as possible.
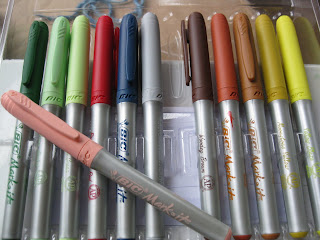
I use pens made by Bic - but Sharpies work as well (they might even blend better) but I like the color selection of these bic. Just as long as they are permanent ink. Start with a light color - I have chosen a peach for the background of the sunset and gradually chose a darker color - up to red and blended.


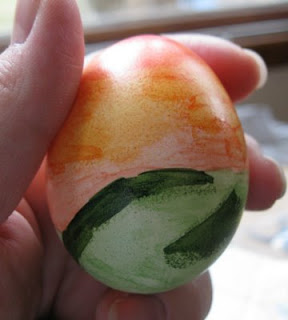
You layer the one color (mine is peach) and then add a second color - a small patch at a time these pens dry really quickly - and use your fingertip to blend the color. Experiment with this - the more color you lay down the more you can blend (One quick stroke wont let you blend at all). Then move onto your third and fourth color to create a beautiful sunset color.


Then I used a light green for the grass (all over the bottom of the egg) and then using a darker color green for hill accents. Now this color is drastically darker but you will come in with a medium color and blend all three colors at once. These markers wet the color underneath the one on top and then you can blend them all together. Just try it and you will see.


As you can see I use a different fingertip for each color family I use. Its hard to wash these off but worth it in the end. I do wash my finger tips when all the blending is done because your fingers do get sticky from all the ink.

I chose a dark brown for the trees and added leafs and details as you can see. The brown overtakes what ever background blended color because its darker.


This is the other side of the egg. This other one was done by my 5 year old. Its Daddy in a canoe with a fishing pole/bobber and worm tempting a fish. Ha Ha. - so cute.
To finish off the egg and give it a loop string - Cut a small circle of felt and sew a piece of yarn through it. You can create a loop or not, and send it through the egg and tie it off. The felt piece can be glued on the bottom of the egg or not but it gives the egg a place to rest.


I would love to see anything you guys decorate!


8 comments:
These are beautiful and fairly simple. We are doing Ukrainian Easter Eggs this year, I'll maybe have one finished by Easter Sunday.
Thank you for this... I've been wanting to draw on eggs with my daughter but haven't had the energy to seek out how to do it... know I know and we will definitely give it a try!
I want to follow your blog but can't find where to... I think I'm being dumb (I baby brain!) but can you tell me where your 'follow' button is.
I haven't tried the blending, but my girls and I decorate wooden eggs with Sharpies, and we love that, too!
I like our wooden eggs because we can keep them from year to year, but I'm glad to know we can also try this on the ephemeral eggs, as well.
Thay look beautiful.
The kids drew on hard boiled eggs at school.
I would like to try this next year.
Thanks for the Tutorial.
Thank you this looks lovely, we tried this yesterday as well and we have blogged our eggs. Have a wonderful Easter...
Ummm ... I think you mean 'gently' tap the egg. The other way is just creepy ;-)
Beautiful!...I will have to try this next year...
Post a Comment